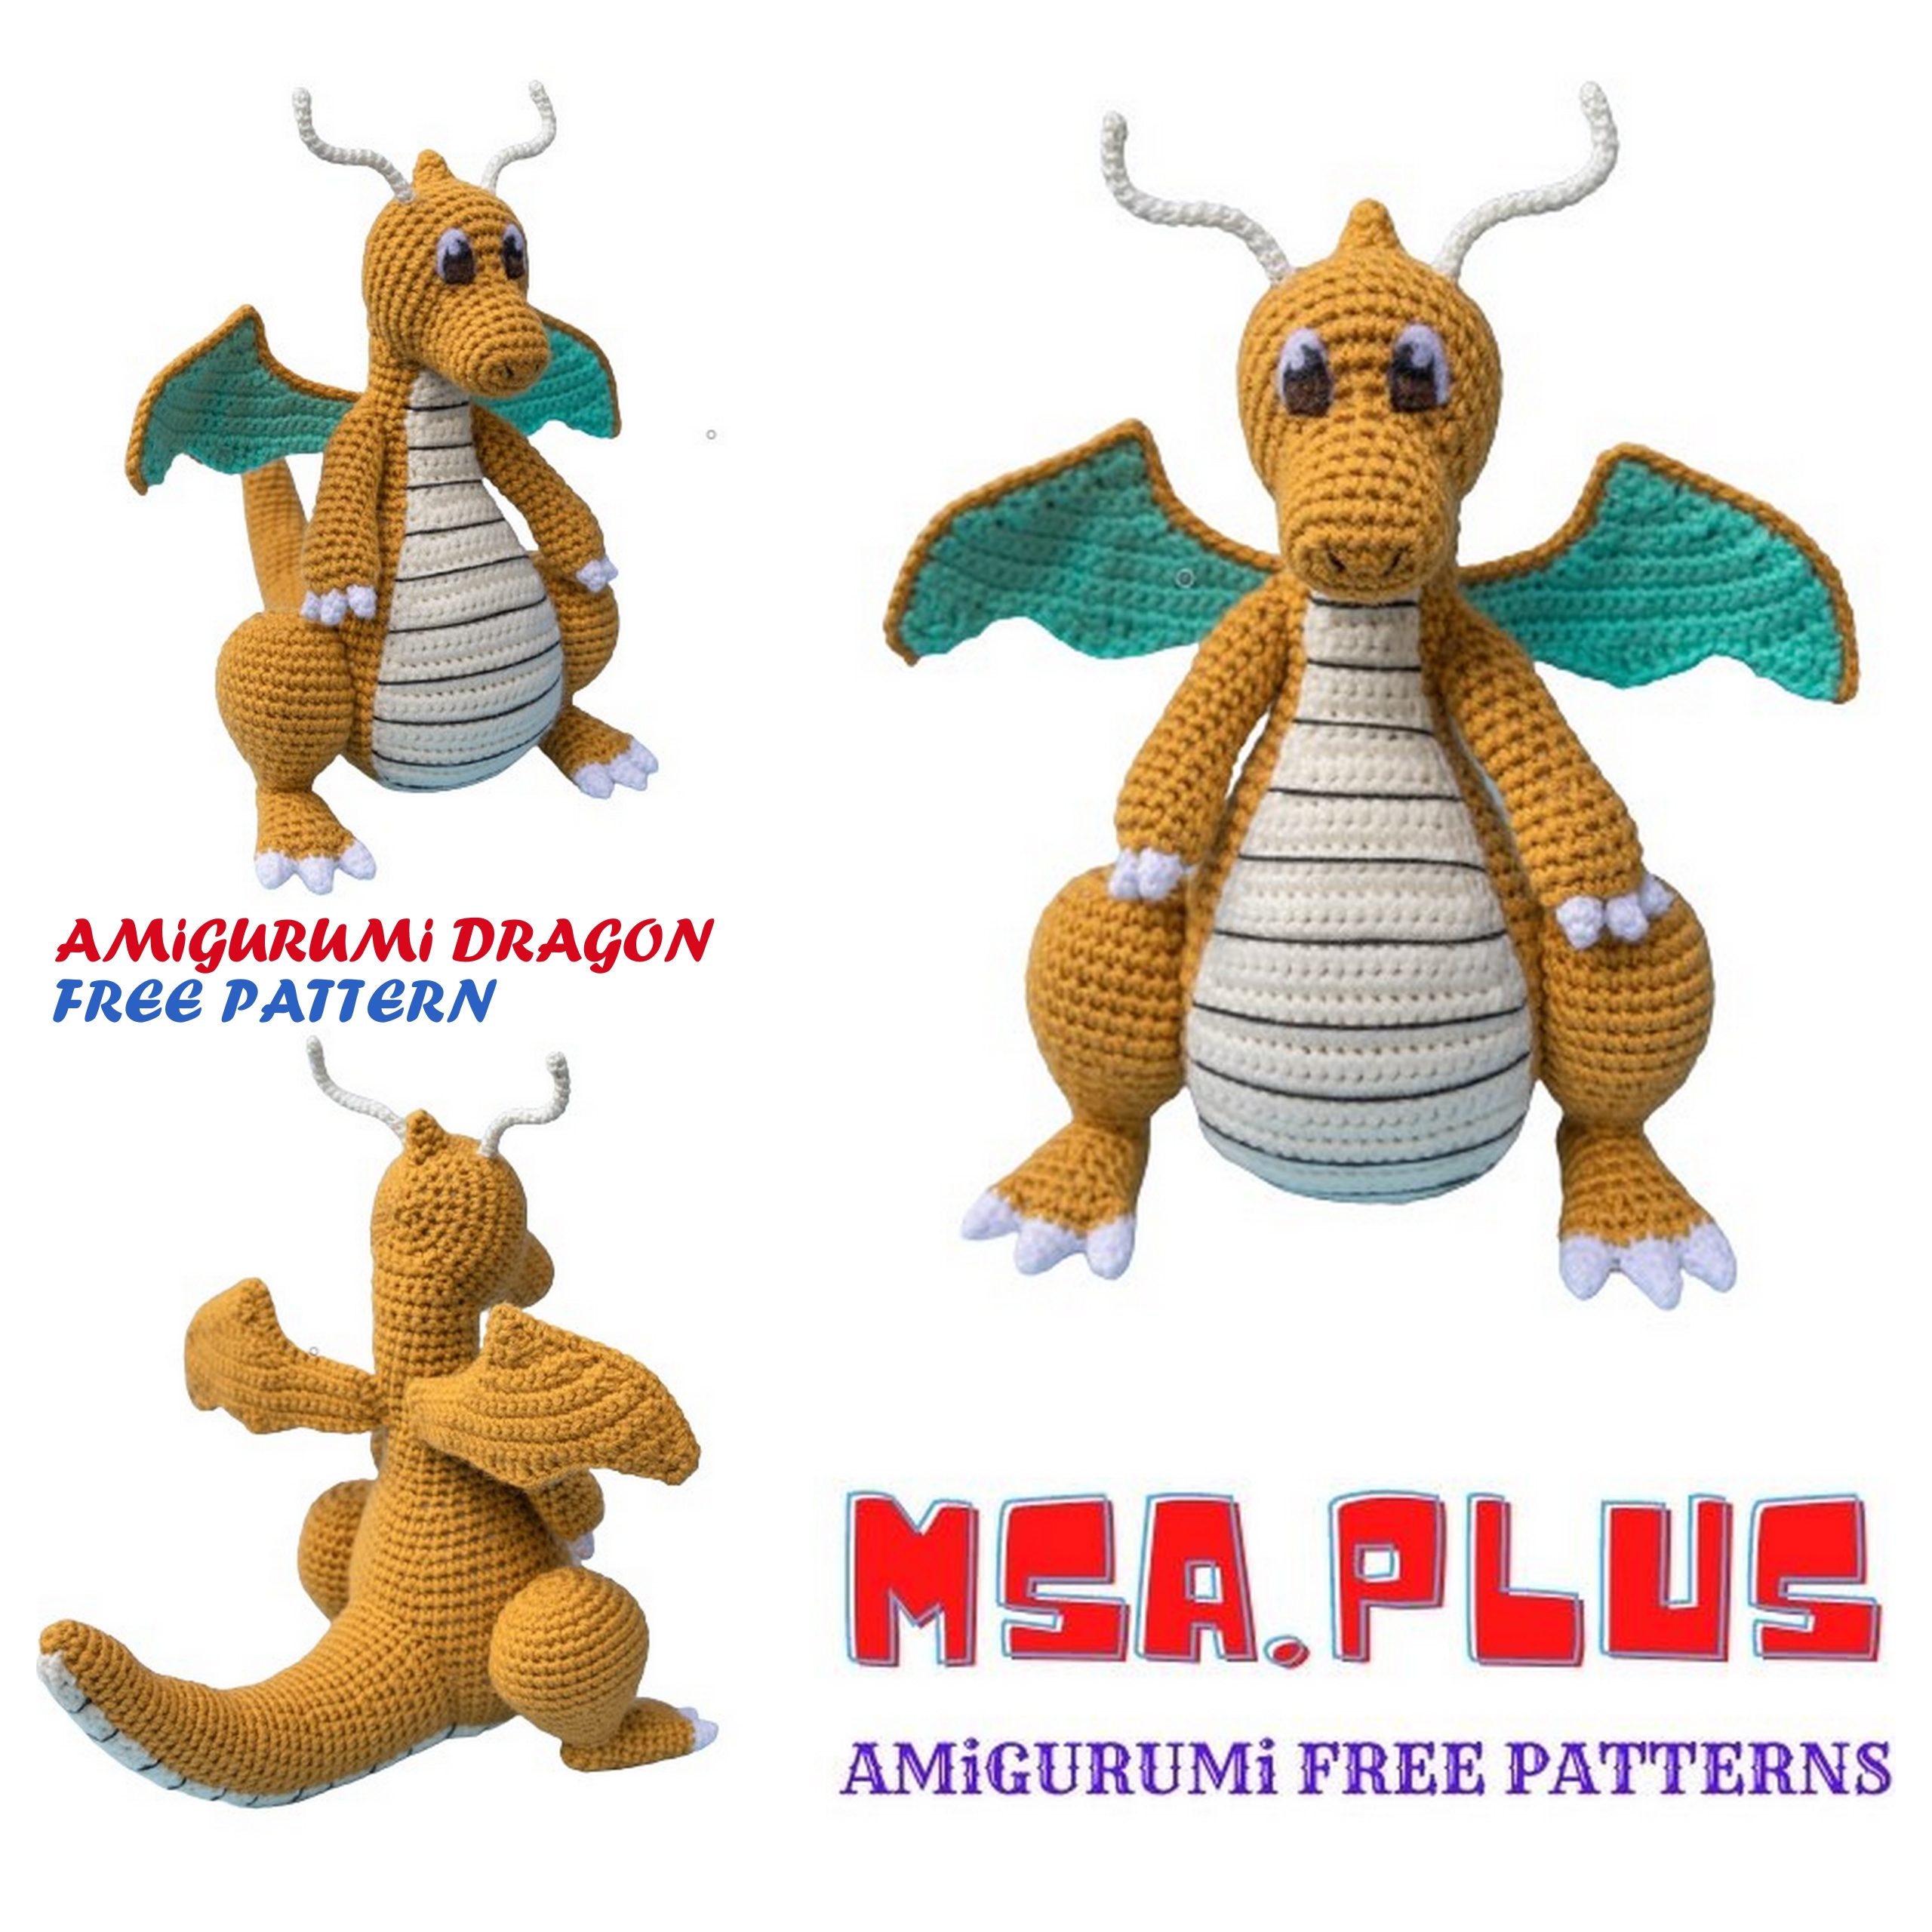
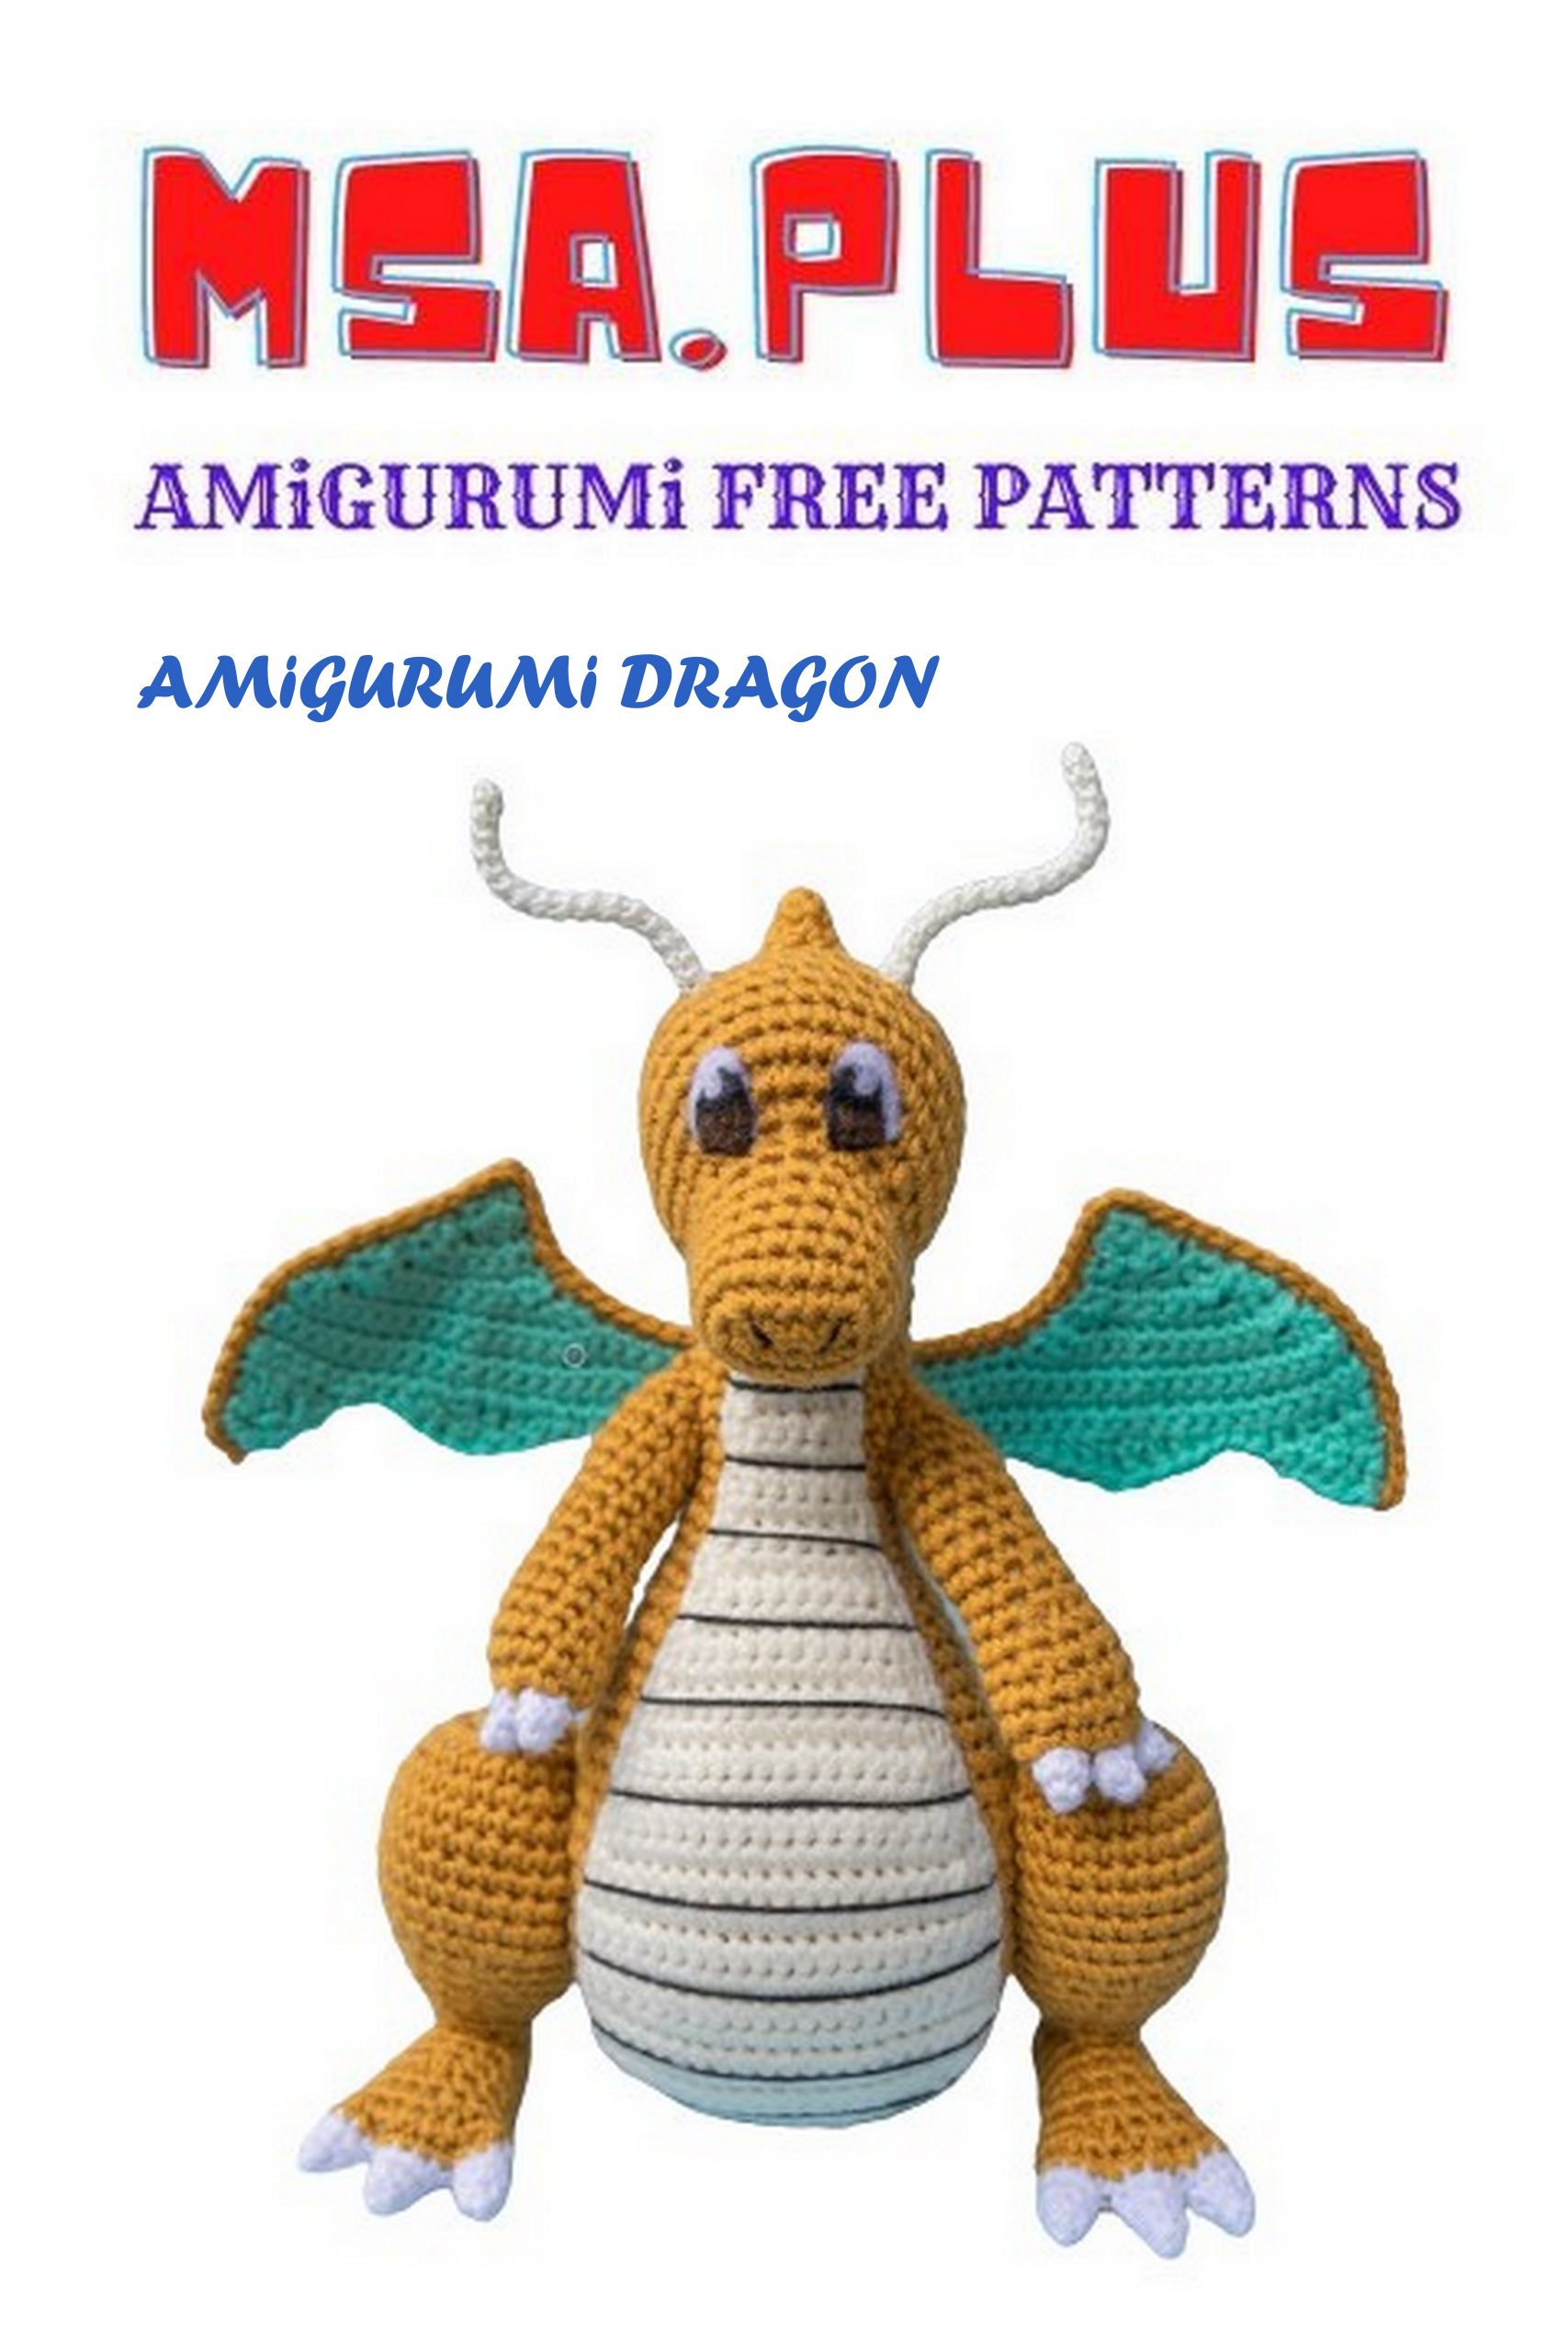
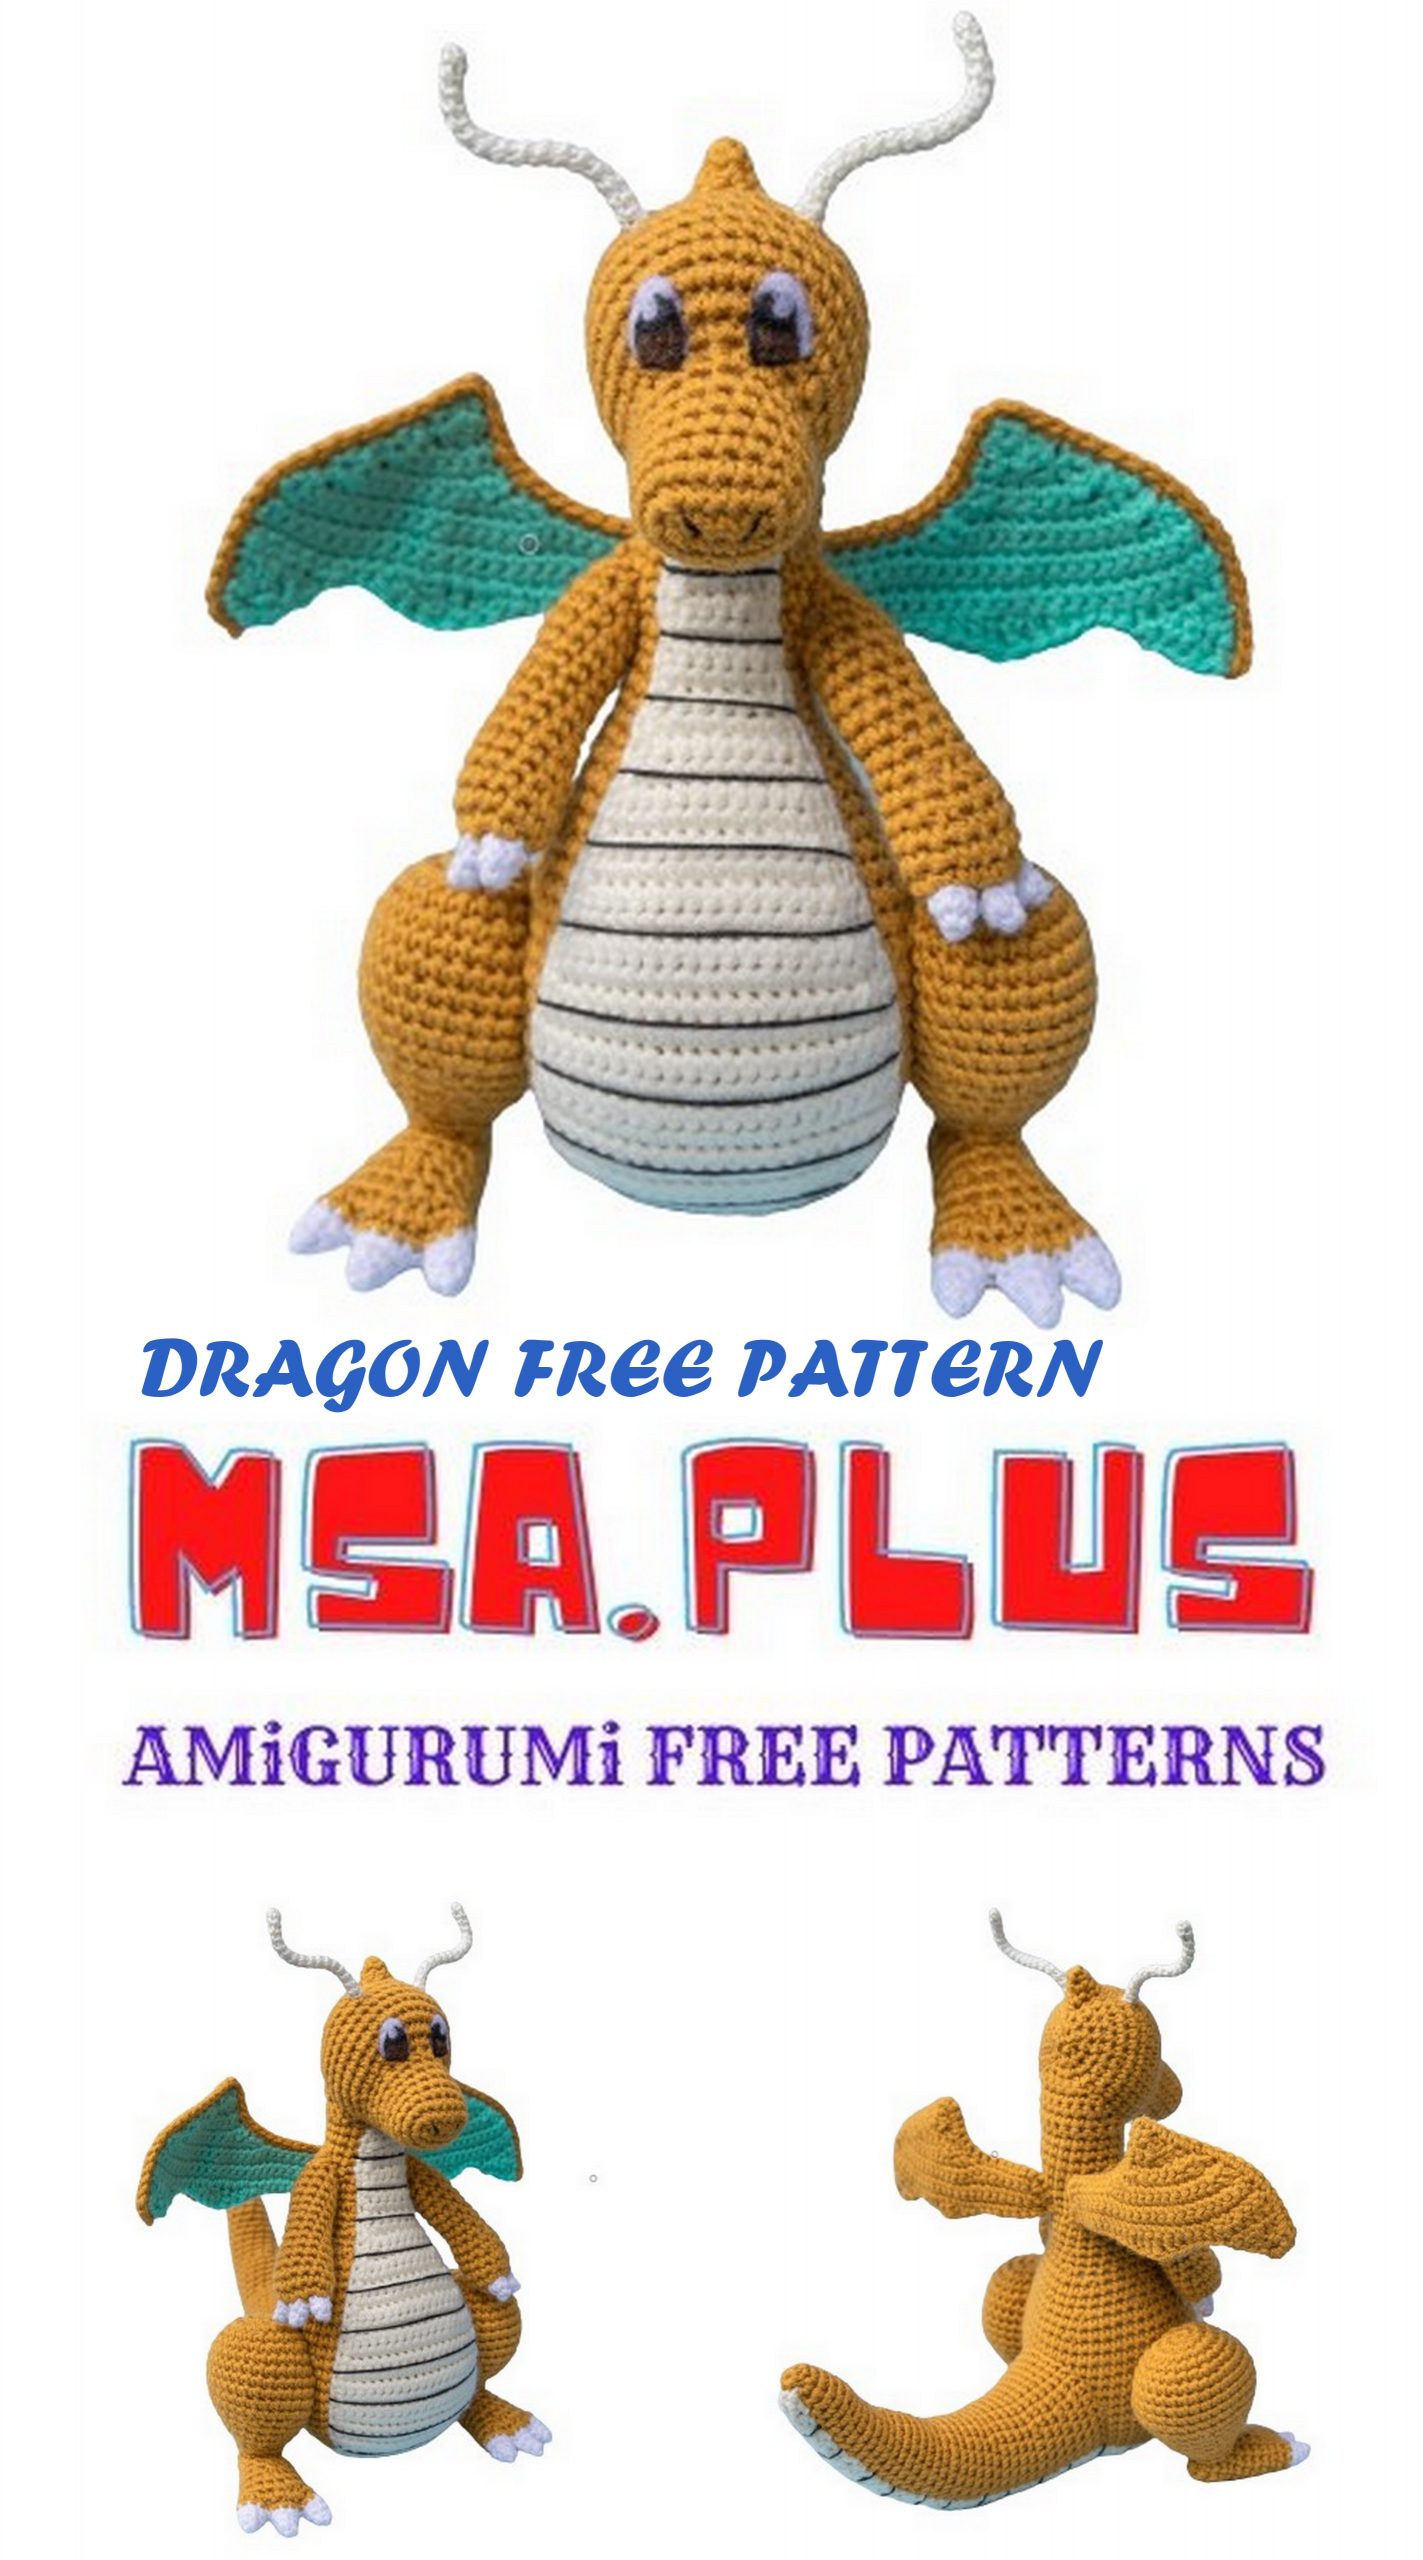
Dragon Amigurumi Free Pattern
I continue to share new amigurumi free patterns with you. In this article, amigurumi dragon free pattern is waiting for you.
Materials
Gold yarn
Cream yarn
Turquoise yarn
Black felt
White felt
Brown felt
White cotton yarn (smaller gauge used for toes and finger claws)
Cream embroidery thread (antenna)
Black embroidery thread (underbelly stripes and nostrils)
Fibrefill
Tapestry needle
Scissors
3mm and 2mm crochet hooks
Wire (optional, for wing and leg support. Not really optional for the antenna. You can also add wire to the arms and neck if you want to be able to pose those.)
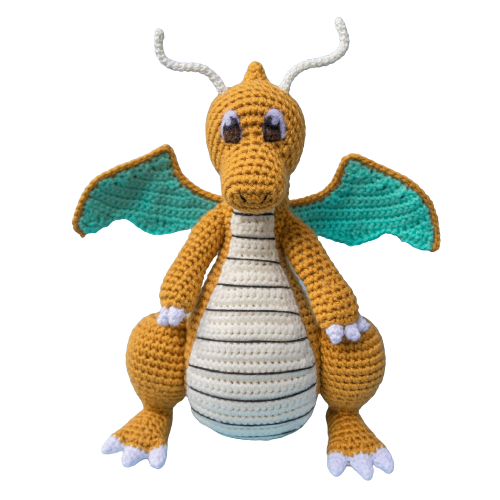
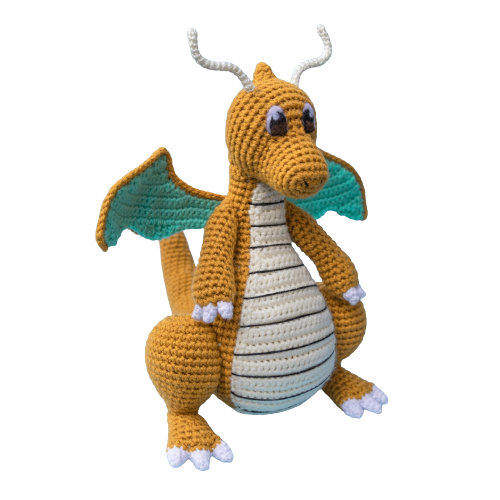
I used 4 Seasons Marvel 8 ply acrylic wool, but I am in New Zealand so it’s unlikely that you will be able to find this yarn wherever you are! It shouldn’t matter which brand you use, just try to use all the colours from the same range so that you don’t have an issue with the different coloured pieces not matching up. You may also need to change your hook size dependent on your yarn brand. Different yarns will create slightly different sized toys at the end. My finished Dragonite measured 11 x 8 x 9 inches.
Abbreviations
US crochet terms
sc: Single crochet
hdc: Half-double crochet
hdcinc: Half-double crochet increase (2hdc in the same stitch)
dc: Double crochet
ss: Slip stitch
ch: Chain
inc: Increase (2sc in the next stitch)
dec: Decrease (I use invisible decrease when crocheting in the round as I think they look tidier)
[…] x 2: Repeat the instructions within the square brackets 2 times (or whatever the number is)
(…): Number of stitches in that round/row
Instructions will be crocheting in the round and with the 3mm hook unless specified otherwise.
PATTERN
Crochet Instructions
crochet the following pieces:
1 x Body in gold yarn
1 x Tail in gold yarn
2 x Legs in gold yarn
Head
Make 1 using gold yarn
Round 1: ch6, 4sc, 3sc into the next ch, 3sc, inc (12)
Round 2: inc, 3sc, 3inc, 3sc, 2inc (18)
Round 3-7: 18sc (18)
Round 8: 2sc, 2hdc, 2hdcinc, 3hdc, 10sc (19)
Round 9: inc, sc, 6inc, 11sc (26)
Round 10: 1sc, inc, 5sc, 6inc, 4sc, inc, 8sc (34)
Round 11: sc, inc, 23sc, inc, 8sc (36)
Round 12-16: 36sc (36)
Round 17: [2sc, dec, 2sc] x 6 (30)
Round 18: [3sc, dec] x 6 (24)
Round 19: [sc, dec, sc] x 6 (18)
Round 20: [sc, dec] x 6 (12)
Round 21: 6dec (6)
Slip stitch to finish off then using your yarn needle, thread the needle back and forth through the front loops and pull tight to close the hole. Push the needle through to the other side of the head and cut the yarn.
Sew this onto the top of the neck, making sure you put more of an angle on the muzzle pointing down than the charizard pattern (who has the snout sticking straight out). Embroider on two slits for the nostrils using the black embroidery thread.
Horn
Make 1 using gold yarn and the 2mm hook
Round 1: 4sc in a magic circle (4)
Round 2: [1sc, inc] x 2 (6)
Round 3: [1sc, inc] x 3 (9)
Slip stitch to finish it off and leave a tail to sew the horn to the head.
I sewed the horn about 3 rows up from the finished end of the head.
Feet
Repeat the following process for Toes and Foot twice, using gold and white yarn with both crochet hook sizes
Toes
Make 3 using white yarn (I used a cotton yarn that had a slightly smaller gauge just to keep the shape a bit neater with a sharper spike) and the 2mm hook
Round 1: 4sc in a magic circle (4)
Round 2: [1sc, inc] x 2 (6)
Round 3: [1sc, inc, 1sc] x 2 (8)
Round 4: 8sc (8)
Slip stitch to finish off and cut yarn for the first two toes leaving a small tail you can still sew a few stitches with. For the third toe, instead of slip stitch to finish off, change colour to gold yarn and change to the 3mm hook.
Foot continued from toe…
Using gold yarn
Round 5: 4sc into the third toe, 4sc into the second toe, 8sc all around the first toe, 4sc on the second toe, 4sc on the third toe (24)
Round 6: [1sc, dec, 1sc] x 6 (18)
Use the small tail ends from the toes to sew up the holes between each toe.
Round 7: [2sc, dec, 2sc] x 3 (15)
Round 8: 15sc (15)
Round 9: [3sc, dec] x 3 (12)
Round 10-11: 12sc (12)
Round 12: [1sc, dec, 1sc] x 3 (9)
Round 13-14: 9sc (9)
Stuff the foot a little.
Round 15: 1sc, 4dec (5)
Slip stitch to finish off and weave in and out of front loops and pull to close up the hole.
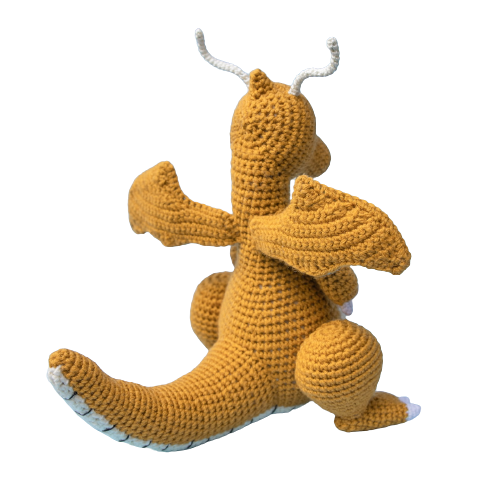
If using wire, thread some through the foot and up into the leg. Sew each foot to the leg. I put the heels quite far forward on my Dragonite to get the foot looking more different than Charizards.
Underbelly
Make 1 using cream yarn (note: this is not crocheted in the round and will be in rows)
Round 1: ch5, 4sc (4)
Round 2-3: ch1, turn, 4sc (4)
Round 4: ch1, turn, inc, 2sc, inc (6)
Round 5-8: ch1, turn, 6sc (6)
Round 9: ch1, inc, 4sc, inc (8)
Round 10: ch1, 8sc (8)
Round 11: ch1, turn, inc, 6sc, inc (10)
Round 12: ch1, turn, inc, 8sc, inc (12)
Round 13: ch1, turn, 12sc (12)
Round 14: ch1, turn, inc, 10sc, inc (14)
Round 15: ch1, turn, 14sc (14)
Round 16: ch1, turn, inc, 12sc, inc (16)
Round 17: ch1, turn, 16sc (16)
Round 18: ch1, turn, inc, 14sc, inc (18)
Round 19: ch1, turn, 18sc (18)
Round 20: ch1, turn, inc, 16sc, inc (20)
Round 21-27: ch1, turn, 20sc (20)
Round 28: ch1, turn, dec, 16sc, dec (18)
Round 29: ch1, turn, dec, 14sc, dec (16)
Round 30: ch1, turn, dec, 12sc, dec (14)
Round 31-39: ch1, turn, 14sc (14)
Round 40: ch1, turn, dec, 10sc, dec (12)
Round 41-43: ch1, turn, 12sc (12)
Round 44: ch1, turn, dec, 8sc, dec (10)
Round 45: ch1, turn, 14sc, dec, 14sc (9)
Round 46: ch1, turn, 9sc (9)
Round 47: ch1, turn, 14sc, dec, 3sc (8)
Round 48: ch1, turn, 8sc (8)
Round 49: ch1, turn, 3sc, dec, 3sc (7)
Round 50-52: ch1, turn, 7sc (7)
Round 53: ch1, turn, 3sc, dec, 2sc (6)
Round 54-56: ch1, turn, 6sc (6)
Round 57: ch1, turn, 2sc, dec, 2sc (5)
Round 58-61: ch1, turn, 5sc (5)
Round 62: ch1, turn, 2sc, dec, sc (4)
Round 63-67: ch1, turn, 4sc (4)
Round 68: ch1, turn, sc, dec, sc (3)
Round 69-71: ch1, turn, 3sc (3)
Round 72: ch1, turn, sc, dec (2)
Round 73: ch1, turn, 2sc (2)
Round 74: ch1, turn, dec (1)
Border: ch1, sc around the edge to make the border. Finish off.
Slip stitch to finish off and leave a long tail for sewing onto the body.
Sew this onto the body, making sure it goes all the way from up against the head to the end of the tail.
Embroider the stripes onto the underbelly, I spaced mine 3 rows apart.
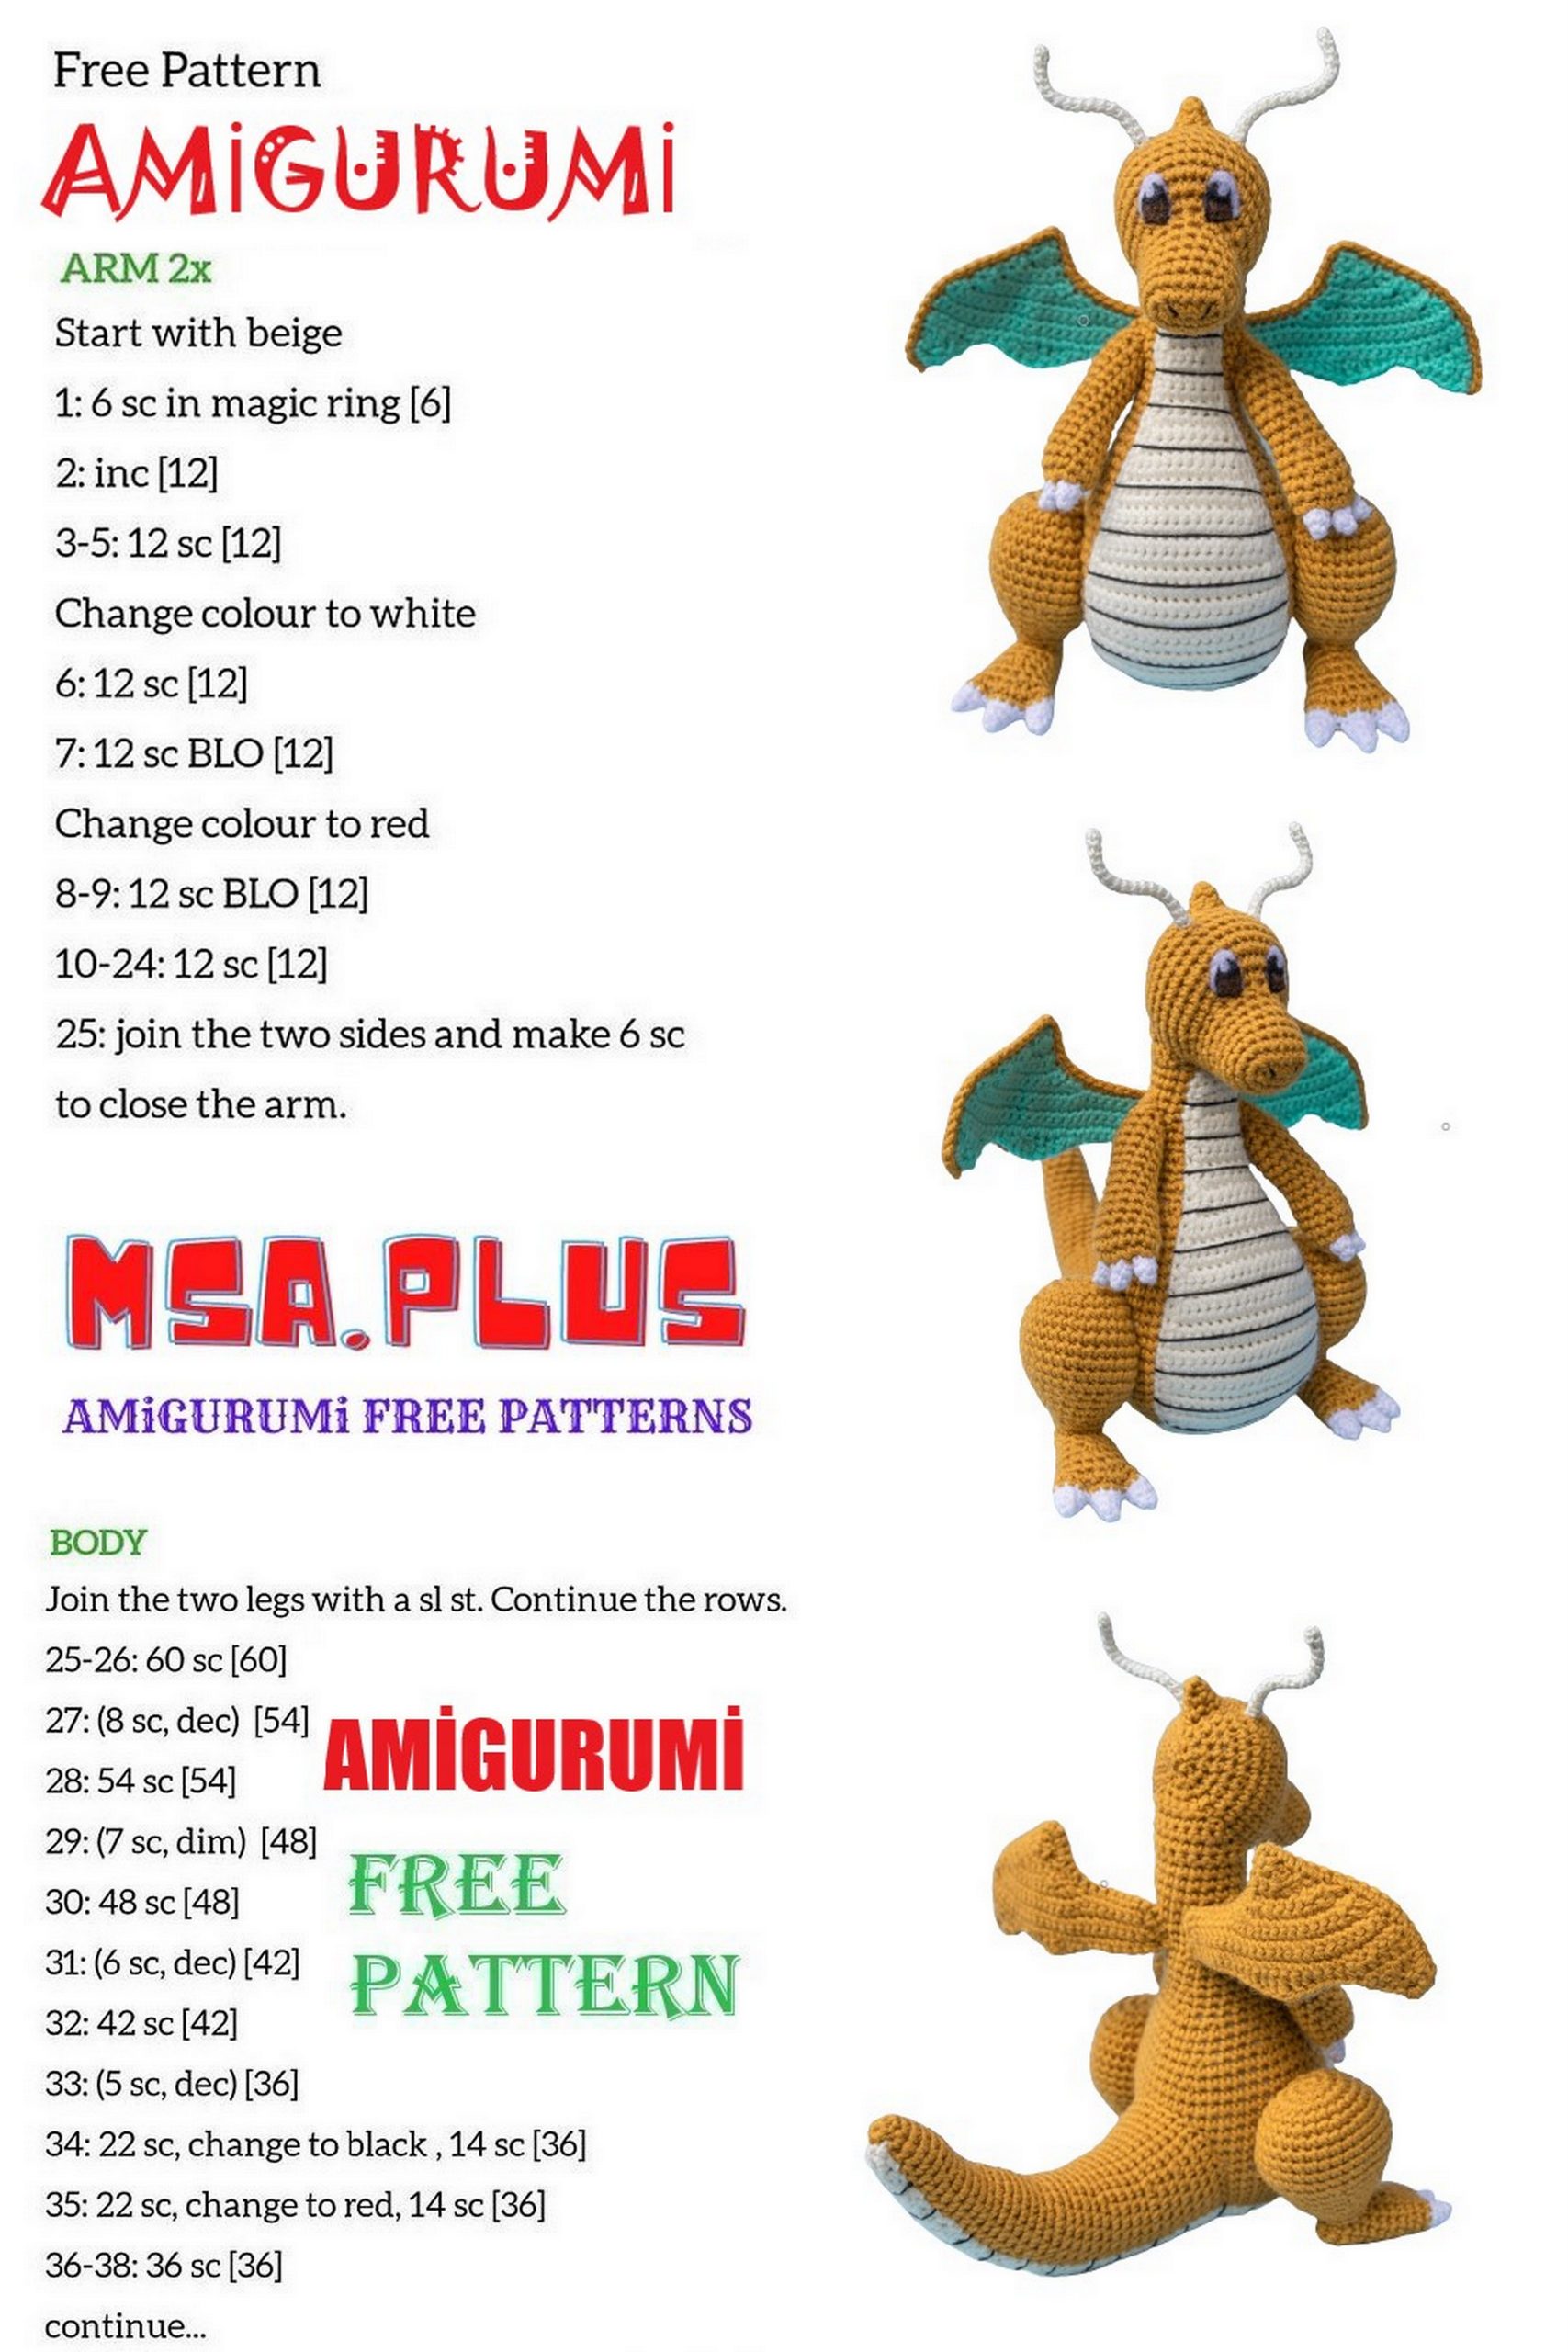
Arms
Make 2 using gold yarn
Round 1: ch5, 3sc, 3sc into the same stitch, 2sc up the other side of the chain, inc (10)
Round 2: inc, 3sc, 2inc, 3sc, inc (14)
Round 3-4: 14sc (14)
Round 5: 5sc, dec, 5sc, dec (12)
Round 6: 12sc (12)
Round 7: 4sc, dec, 4sc, dec (10)
Round 8-15: 10sc (10)
We will now start working in rows
Round 16: 3sc, ss (4)
Round 17: turn, sc into last sc of the last round, 3sc, ss (5)
Round 18: turn, 3sc, ss (4)
Round 19: turn, sc into last sc of last round, 2sc
Finish off. Lightly stuff the arm.
Sew the arms to the body. I sewed mine about 6 rows down from the head.
Finger claws
Make 6 using white (smaller gauge) wool and the smaller 2mm crochet hook
Round 1: 4sc in a magic circle (4)
Round 2: [1sc, inc] x 2 (6)
Finish off and leave a small tail to sew to the arm. Sew three claws onto the starting end of each arm.
Antenna
I started by making the wire antenna to help me decide how long I wanted to have them (hopefully you have more luck deciding on your wire shape than I did so you wire isn’t as munched up as mine 😅). Make sure to bend the ends around so that they won’t poke through the crocheted parts. I also ended up painting my wire white so I couldn’t see the green of the wire through the embroidery thread.
Make 2 using cream embroidery thread and the smaller 2mm crochet hook
Round 1: 4sc in a magic circle (4)
Round 2-19: 4sc (4)
Slip stitch to finish off.
Thread the wire through the head and then thread each antenna onto the wire and sew onto the head. I have 3 rows between the top of the eyes and the antenna and 7 stitch holes between the two ends of wire.
Wings
Make 2 using green yarn and 2 using gold yarn (note: these will be crocheted in rows)
Round 1: ch2, 1sc in second chain from hook (1)
Round 2: ch1, turn, 3sc into the same stitch (3)
Round 3: ch1, turn, hdcinc, 2sc (4)
Round 4: ch1, turn, 2sc, inc, hdcinc (6)
Round 5: ch1, turn, hdcinc, inc, 4sc (8)
Round 6: ch1, turn, hdcinc, inc, 4sc, inc, hdcinc (12)
Round 7: ch1, turn, hdcinc, 9sc, inc, hdcinc, ch8 (23)
Round 8: turn, 20sc, inc, hdcinc (24)
Round 9-11: ch1, turn, 24sc (24)
Round 12: ch1, turn, 8sc, hdc, 2dc, 2trc, 2dc, hdc, 2sc, 6hdc (24)
Round 13: ch2, turn, 2dc, hdc, sc, ss (5)
Round 14: turn, ss into the sc from Round 13, sc, hdc, trc (4)
Finish off and weave in the end of the green wing, don’t finish off one of the gold wings.
Before you go any further, using the 6 inch tail on the green wings, sew on a middle support wire (making sure you have a left wing and a right wing and don’t accidentally sew the wire on the same side twice!). The charizard pattern has more photos and instructions on what this should look like.
Bend a wire to the same shape as the outline of your wing (all sides except bottom part), this will be stitched on when you join the two colours together and then stuck into the body to help hold up and shape the wings.
For the gold wing still on your hook, attach the start of the wire to the gold wing using a small dot of glue, align a green wing (wire side against the gold wing to hide it on the inside of the wing), and crochet around the edge of the wing. If you crochet with the green side of the wing facing you, the tidier crochet stitch will be facing the front of the dragonite (which I’m assuming will be the side visible more often).
For the other gold wing (the one finished off earlier, not on your hook), you will need to pull up some gold yarn again and stitch the remaining two wings together like you did before with the wire but to get the edge stitch looking the same on both wings, you will need to start from the inside bottom edge of the wing. Don’t forget to leave a long tail to sew the wing to the body when starting with the gold yarn.
Hopefully that all made sense and I didn’t make it too confusing 😅
Sew the wings onto the back of the body. I sewed mine around 10 rows down from the top of the neck and had 2 stitch holes between where the wire for the two wings was inserted into the body.
Eyes
I feel like I cheated a bit here, but I traced the eyes onto a piece of paper from a picture of Dragonite then cut out all the pieces in black, white and brown (the proper eye colour is more of a green/grey, but I was in lockdown because of the C Who Cannot Be Named and had to do it with what I had at home). I needle felted them on, but you could use craft glue to do this or sew them on too.